2026 Top Tips to Prevent Outdoor Commercial Wall Pack Glare

Time:2026-09-26 Author:Oliver
0%

A wall pack should make a doorway visible, not turn the sidewalk into a bright stage. Yet glare often slips into a project through small choices: a fixture mounted too low, a bare lens aimed outward, or more output than the entrance needs. The result can be uncomfortable for pedestrians and distracting for drivers. It can also wash out details near the door. Learning how to prevent glare from outdoor commercial wall packs starts with looking at the actual site after dark, not only at a product sheet.

Lighting researcher Mark Rea is often associated with the concise phrase, “Light is a drug.” His work concerns light and its effects; the phrase is a useful reminder that more light is not automatically better. For wall packs, control matters. Choose optics that direct light down and across the intended walking area. Add shielding where it blocks a direct view of the bright source. Aim carefully, and check the fixture from the opposite sidewalk and approaching driveway. Small changes can matter.

This guide looks at practical ways to reduce glare while keeping entrances usable. It covers mounting position, distribution, output, controls, and nighttime checks. A paper plan may look tidy. The installed light may still feel harsh beside a glossy sign or pale brick wall. That is worth noticing. Measure where useful light lands, then adjust before adding more fixtures. No single setting fits every building, but a careful review can make the entrance safer and more comfortable without lighting beyond its purpose.
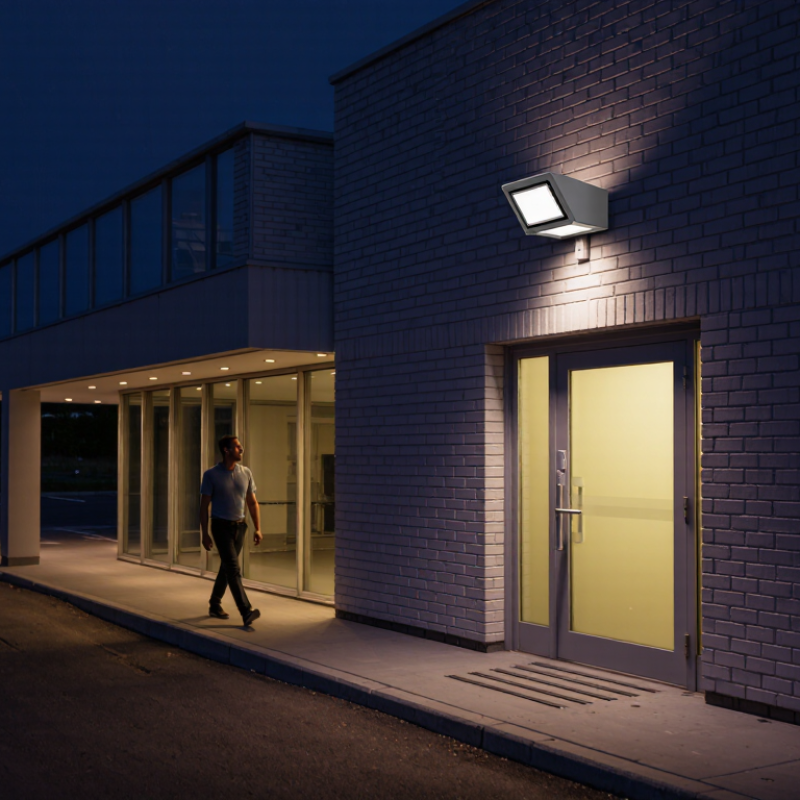
2026 Top Tips to Prevent Outdoor Commercial Wall Pack Glare

Understand How Commercial Wall Pack Glare Occurs

Commercial wall pack glare occurs when a bright light source enters a person’s direct line of sight. A compact LED array can appear harsh against a dark building, even when it provides enough light for a walkway. The effect depends on viewing angle, mounting height, fixture output, and nearby surfaces. Glare can also come from poorly controlled light spilling beyond the intended area. Wet pavement and glass doors may reflect it back toward pedestrians. That is glare. Small angles matter.

Tips: View the fixture from the sidewalk, parking area, and approach to each entrance. Check it after dark, not only from a ladder during installation. If the LEDs are plainly visible from common walking paths, consider a shielded optic or a different mounting angle. Compare the fixture’s photometric distribution with the area that actually needs illumination.

A common mistake is judging performance from the ground directly beneath the wall pack. That spot may look bright while the sidewalk farther away remains uneven. Tall mounting can reduce direct exposure in some layouts, but it can also send light into upper windows. A site walk-through helps reveal these trade-offs. I would recheck the aim after nearby signs, doors, or reflective surfaces change; small changes can alter where the light lands.

2026 Top Tips to Prevent Outdoor Commercial Wall Pack Glare — Understand How Glare Occurs

Direct exposure to a bright wall pack can contribute to glare. This idealized point-source model shows how illuminance falls with distance according to the inverse-square law, with the 5 m value set to 100%. Real fixtures have directional light distributions, so actual results vary. To reduce glare, use an appropriately shielded fixture, aim light away from viewers, and avoid placing bright sources in direct line of sight.

Assess Site Conditions and Identify Glare Sources

Assess Site Conditions and Identify Glare Sources

A wall pack can look well aimed during the day and still shine into a bedroom after dark. Walk the property at night, when nearby windows, sidewalks, and parking areas are easier to assess. Note mounting height, wall direction, and the fixture’s distance from doors or neighboring buildings. Small changes in elevation can alter where the light lands.

Look for direct glare and reflected glare. Direct glare occurs when people can see the bright light source from common viewing points, such as a driveway entrance or a second-floor window. Reflections may appear on glass, pale walls, metal doors, or wet pavement. Stand at pedestrian eye level and check each approach. Then view the fixture from inside nearby rooms, if access is available. It can be surprising.

Record observations with simple photos and a sketch showing the fixture, windows, and walking routes. Include operating conditions: some lights brighten only when motion is detected, while others remain on through the night. Compare the site under both conditions when possible. I have found that a quick daytime inspection can miss a troublesome angle, so treat early notes as provisional. Recheck after any aiming or shielding adjustment, especially from the locations where people actually walk and work.

2026 Top Tips to Prevent Outdoor Commercial Wall Pack Glare - Assess Site Conditions and Identify Glare Sources

Site Condition Potential Glare Source What to Assess Practical Prevention Verification Check
Pedestrian entrances and walkways Bright LEDs or exposed light sources visible to people approaching the building View the fixture from typical walking directions and eye level, including the approach to doors and paths. Choose a shielded, downward-directed optic and position the fixture so its light source is not directly visible from common viewpoints. Inspect the approach after dark from several directions; confirm that the entrance is visible without a direct line of sight to the LEDs.
Nearby homes or occupied windows Light spilling through windows or across property boundaries Identify window locations, property lines, and the direction in which the fixture’s brightest output is aimed. Use shielding or a suitable distribution pattern, and aim light only toward the area that needs illumination. Check for light entering windows and review boundary illuminance against applicable local requirements.
Open parking areas and vehicle routes High-intensity light in a driver’s direct line of sight Assess views from vehicle entrances, parking spaces, drive aisles, and nearby roads. Select an appropriate wall-pack distribution and mounting location; avoid unnecessary output and poor aiming. Observe the installation from seated driver positions at night and look for discomfort or distracting bright spots.
Mounting height and wall layout Fixtures mounted too low, too high, or too close to a viewing angle Record mounting height, wall orientation, nearby corners, and the areas that need light. Locate fixtures to provide useful coverage while keeping the light source and high-angle output out of common sightlines. Compare the installed position with the lighting layout and confirm coverage on site after dark.
Glossy, light-colored, or reflective surfaces Reflected brightness from glass, polished metal, pale walls, or wet pavement Identify surfaces that reflect light toward pedestrians, drivers, or neighboring properties, including when wet. Adjust fixture placement or distribution to reduce direct illumination of reflective surfaces; use shielding where suitable. Inspect reflections from likely viewing positions in both dry and wet conditions when practical.
Fixture aiming and tilt Light directed outward or upward instead of toward the intended task area Check the fixture’s orientation, mounting surface, and any tilt or aiming adjustment. Install and aim the fixture according to its instructions and photometric layout; avoid upward tilt unless the design specifically requires it. Confirm the installed orientation and check for light above the horizontal or beyond the target area.
High-output or poorly matched equipment Excessive brightness or an unsuitable beam pattern Compare the fixture’s lumen output and distribution with the site’s actual safety and visibility needs. Specify only the output needed for the application and consider a lower-output option, dimming, or controls where appropriate. Review the lighting plan and measure site illuminance with a light meter; compare results with project criteria and local codes.
Color appearance and nighttime surroundings Harsh-looking light that stands out against a darker environment Consider surrounding land use, existing lighting, local rules, and whether a lower correlated color temperature is appropriate. Where suitable and permitted, consider a warmer color temperature, such as 3000 K or lower, while maintaining the required visibility. Confirm the selected color temperature in the product specification and assess visual comfort on site at night.
Operating hours and changing site activity Unneeded nighttime operation that prolongs exposure to bright light Review business hours, after-hours access needs, security requirements, and periods of low activity. Use properly configured timers, photocells, or occupancy controls where appropriate and allowed by local requirements. Test control settings after dark and verify that required areas remain illuminated when needed.

Select Wall Pack Fixtures with Proper Optical Control

Select wall pack fixtures by their light distribution, not just lumen output.

A bright fixture can still create harsh glare across a sidewalk or into nearby windows. The Illuminating Engineering Society’s TM-15-20, Luminaire Classification System for Outdoor Luminaires, assigns separate Backlight, Uplight, and Glare ratings, each graded from 0 to 5. Compare these BUG ratings in product photometric files; a lower Glare rating can help limit high-angle brightness, though the mounting location still matters. Look for a shielded optic that sends light down the wall and onto the walking surface, rather than outward into a driver’s line of sight. Small detail. Big difference.

Check the photometric distribution before installation.

A beam that looks controlled on a catalog page may spill across a glass entry when mounted above it. Use the fixture’s IES file to review candela values at likely viewing angles, then verify spacing and mounting height on site.

Aiming matters, too.

Keep the lens level and avoid tilting it outward to “reach” a distant corner; that can expose the light source and increase discomfort. IES ratings are useful screening data, not a guarantee of comfort. I would still inspect the wall pack after dark, from the approach path and nearby windows. Sometimes the approved layout needs adjustment.

Install and Aim Fixtures for Safe, Even Illumination

Outdoor wall packs should light walking routes, doors, and loading areas without shining into people’s eyes. Mount each fixture at a height suited to the wall and the space below; a higher position is not automatically better. Before drilling, mark the proposed locations and check where the beams land on the ground. Aiming slightly downward helps keep light off windows and neighboring properties. Keep the lens level unless the fixture instructions call for a specific tilt. Small adjustments matter.

Test the layout after dark. Stand near the entrance, then walk the route at normal eye level. Look for bright spots, deep shadows, and direct glare from the lens. Even illumination is safer than a harsh pool of light beside a dark path. If one area is too bright, adjust the angle or spacing before adding more fixtures. Follow the manufacturer’s mounting instructions, and use a qualified lighting professional when wiring or access is beyond your training. Older walls can make consistent spacing awkward; measure carefully, but accept that the structure may limit a perfect pattern. Recheck aiming after cleaning or repairs, since a bumped fixture can send light straight across a walkway. Small changes can be easy to miss.

Maintain Lighting Systems and Verify Glare Reduction

A commercial wall pack can create harsh glare even when its lamp still works. Dust on the lens, a loose mounting plate, or a shifted photocell can alter how light reaches the ground. Inspect the fixture after dusk, when bright spots and dark gaps are easier to see. Small faults matter. Clean the lens with a soft cloth and check for cracked seals, corrosion, or water marks before adjusting the fixture.

After cleaning, confirm that the light points toward the walking and parking areas, not toward windows or approaching drivers. Use a handheld lux meter at the sidewalk and near the building entrance. Record readings from the same locations before and after an adjustment. A meter helps compare changes, but it does not capture every person’s discomfort. Check again after dark, from typical viewing angles.

Keep a simple maintenance log with inspection dates, repairs, and readings. If glare remains, review the fixture’s shield, lens condition, and mounting angle rather than increasing output. That can feel counterintuitive when a corner seems dim, but more brightness may worsen contrast nearby. Recheck after rain or seasonal landscaping changes; branches and wet pavement can shift the apparent brightness. Aiming is rarely a one-time fix.

FAQS

What causes glare from a commercial wall pack?

Glare happens when a bright light source enters someone’s direct line of sight. Mounting height, fixture angle, light output, and nearby surfaces all affect it. Small angles matter.

Where should I check for glare?

Walk the sidewalk, parking area, and each entrance after dark. Check from pedestrian eye level and nearby rooms, if accessible. My daytime notes may miss a troublesome angle.

Can a wall pack look bright but still light the area poorly?

Yes. The ground directly below it may look bright while the sidewalk farther away stays uneven. Check the full walking route, not just one spot.

How can nearby surfaces increase glare?

Glass doors, pale walls, metal doors, and wet pavement can reflect light toward people. Look for bright reflections from several approach angles. It can surprise you.

Does raising or changing the fixture angle always solve glare?

No. A different height or angle may reduce direct glare, but it can send light toward upper windows. Recheck the area after every adjustment.

What maintenance issues can change where the light lands?

Dust, a loose mounting plate, or a shifted photocell can affect the light pattern. Check for cracked seals, corrosion, and water marks. Small faults matter.

How can I tell whether an adjustment helped?

Compare the site after dark from the same walking points. A handheld lux meter can record readings at the sidewalk and entrance. It cannot measure every person’s discomfort.

What should I try if glare remains?

Review the shield, lens condition, and mounting angle before increasing output. More brightness may worsen nearby contrast. Recheck after rain or landscaping changes. Aiming needs follow-up.

Conclusion

Outdoor commercial wall pack glare occurs when bright light is poorly directed, excessively intense, or reflected by nearby surfaces. To reduce it, first assess the site: note entrances, walkways, windows, neighboring properties, mounting heights, and potential reflective areas. Identifying where glare originates helps determine whether the issue calls for a different fixture, a new position, or adjusted output.

When considering how to prevent glare from outdoor commercial wall packs, choose fixtures with suitable optical control, shielding, and light distribution for the area. Install them at appropriate heights and aim them to illuminate walls and paths evenly without sending light into people’s eyes or nearby windows. After installation, check the lighting from several viewing angles and make adjustments as needed. Regularly clean fixtures, inspect their alignment, and verify that the intended areas remain safely illuminated while glare is minimized.

Oliver

Oliver

Oliver is a seasoned marketing professional with a wealth of expertise in driving brand awareness and engagement. With a deep understanding of our company's product offerings, he consistently delivers high-quality content that enriches our professional blog. His insights not only shed light on......