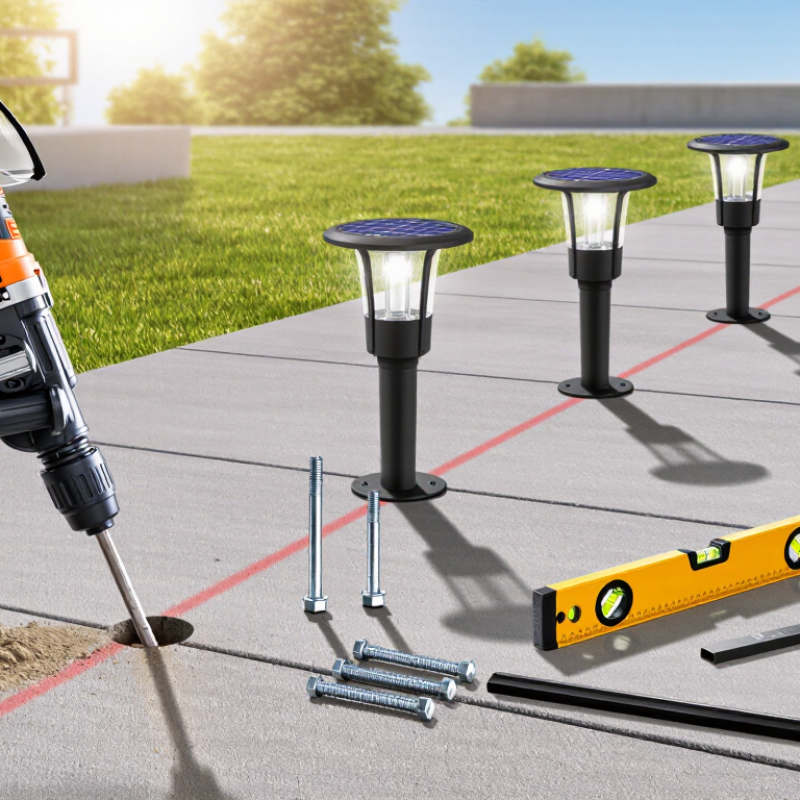
Solar bollard lights can make a concrete pathway safer, brighter, and more inviting after sunset. However, installation requires more than placing a light beside a walkway. Concrete is durable, but drilling it demands careful measurements, suitable tools, and steady handling. This guide explains how to install solar bollard lights on concrete without damaging the surface or weakening the fixture.
The process begins with choosing a sunny position. Nearby walls, trees, and roof overhangs can reduce charging time. Mark each base carefully, keeping the spacing consistent along the path. A typical installation may require a masonry drill, compatible anchor bolts, a level, a pencil, safety glasses, and a vacuum for concrete dust. Always follow the manufacturer’s instructions, because mounting plates and anchor sizes differ between models.
Small details matter.
From practical installation experience, uneven concrete can leave a bollard leaning slightly. A thin outdoor-rated spacer may help, but it should not create movement under pressure. The anchors must sit firmly, while the solar panel needs a clear view of the sky. Do not rush the drilling stage. A misplaced hole can be difficult to repair, and excessive force may chip the concrete edge. This method is practical, but it is not flawless for every surface. Cracked slabs, hidden wiring, or drainage problems may require professional assessment before installation. When installed thoughtfully, these lights can provide dependable guidance with minimal maintenance.
Before installing solar bollard lights on concrete, inspect the site in daylight. Check for cracks, loose edges, standing water, and uneven surfaces. A stable base matters more than appearance. Tap the concrete lightly and look for hollow areas that may indicate damage.
Watch the area from morning to late afternoon. Nearby walls, trees, balconies, and parked vehicles can cast moving shadows across the solar panel. Choose a position with clear sky exposure for most of the day. South-facing placement often helps in the northern hemisphere, but the site’s actual shadows matter more. Mark each possible location with chalk, then observe it at different times.
Keep the lights away from doors, ramps, and narrow walking lines. Leave enough space for cleaning, battery access, and safe movement. Measure the walkway before drilling. Equal spacing can look professional, but practical lighting is more important than perfect symmetry. My first layout looked neat on paper, yet one lamp sat beside a tall planter and received little sunlight. I had to move it.
Also check for buried cables, pipes, and embedded reinforcement before drilling into the slab. Use a suitable concrete bit and follow the fixture’s anchoring requirements. If the surface slopes toward a drain, place the light where water will not collect around its base. A small cardboard mock-up can reveal glare, shadows, and awkward proportions before permanent installation. Take your time. Small site errors become annoying every evening.
| Assessment Dimension | What to Measure or Inspect | Practical Selection Guideline | Example Site Finding | Recommended Decision |
|---|---|---|---|---|
| Direct Sunlight | Observe whether the planned location receives unobstructed sunlight during the main daylight hours. Check nearby trees, walls, roofs, and seasonal shadows. | Choose a position with approximately 6 or more hours of direct sunlight per day where possible. Keep the solar panel facing the strongest available daylight. | The proposed location receives direct sun from approximately 9:00 a.m. to 4:00 p.m. and is shaded after late afternoon. | Suitable |
| Concrete Surface Condition | Check for cracks, loose sections, spalling, surface powdering, oil contamination, and areas that sound hollow when lightly tapped. | The mounting surface should be solid, level, clean, and structurally sound. Do not install over unstable or severely damaged concrete. | The slab is level and clean, with only minor hairline cracks outside the proposed anchor area. | Suitable with Inspection |
| Crack and Damage Clearance | Measure the distance between the planned anchor holes and visible cracks, slab edges, joints, or damaged concrete. | Keep anchors away from cracks and edges according to the anchor manufacturer's instructions. A practical preliminary clearance of at least 100 mm is commonly used, subject to the specific anchor type. | The planned base plate is 150 mm from the nearest control joint and does not overlap a visible crack. | Suitable |
| Surface Level and Drainage | Use a level to check the mounting area and identify places where water may collect around the base. | Select a level or slightly sloped area that drains naturally. Avoid depressions that can keep the base plate, bolts, or wiring wet. | Rainwater flows away from the mounting point toward a nearby drain without pooling. | Suitable |
| Light Spacing | Measure the distance between proposed bollard positions and identify the area that needs pathway or boundary illumination. | For even pathway lighting, begin with approximately 2 to 3 m spacing and adjust according to the light output, beam angle, mounting height, and required brightness. | Four proposed positions are spaced 2.5 m apart along a 10 m pedestrian path. | Good Starting Layout |
| Pathway and Pedestrian Clearance | Check whether the bollard will obstruct walking, doors, gates, ramps, bicycles, lawn equipment, or maintenance vehicles. | Place the light outside the normal walking line while keeping the illuminated area visible. Maintain accessibility and local clearance requirements. | The proposed position is 450 mm from the edge of the walking path and does not reduce the usable path width. | Suitable |
| Underground Services | Identify buried electrical cables, water pipes, drainage lines, irrigation systems, and communications services before drilling. | Confirm service locations using available plans and an appropriate detection method. Do not drill until the area is verified as safe. | An irrigation pipe is shown near one proposed position on the property service plan. | Relocate or Verify First |
| Anchor and Base-Plate Fit | Compare the bollard base-plate dimensions, bolt-hole pattern, anchor diameter, and required embedment with the available concrete thickness. | The base plate must sit fully on sound concrete, and the anchors must match the installation instructions. Avoid drilling too close to slab edges. | The base plate fits within the available area, but the concrete thickness has not yet been confirmed. | Verify Before Drilling |
| Concrete Thickness and Reinforcement | Determine whether the slab is thick enough for the selected anchors and whether reinforcing steel may interfere with drilling. | Use anchor requirements supplied for the selected light. Scan or investigate the concrete when reinforcement or embedded services may be present. | The slab appears to be a thin paving section with unknown thickness and possible mesh reinforcement. | Professional Verification Recommended |
| Nighttime Visibility and Glare | View the location after dark and check sightlines from windows, entrances, driveways, and neighboring properties. | Position the light to illuminate the intended route without shining directly into eyes, windows, or vehicle sightlines. | The proposed light faces the path and does not point toward nearby bedroom windows. | Suitable |
| Weather Exposure | Assess exposure to rain, snow, standing water, coastal salt, dust, lawn sprinklers, and accidental impact. | Use a weather-rated outdoor fixture appropriate for the site. Avoid locations regularly hit by sprinklers or exposed to standing water. | The position is exposed to rain but is outside the sprinkler spray pattern and above the normal drainage level. | Suitable |
| Maintenance Access | Check whether the solar panel, battery compartment, fasteners, and surrounding surface can be accessed for cleaning and servicing. | Leave enough working space to clean the panel, inspect anchors, replace the battery when required, and remove debris. | The light can be reached from the path without moving landscaping or entering a restricted area. | Suitable |
| Final Location Decision | Combine sunlight, concrete condition, safety, drainage, spacing, utility clearance, and maintenance results. | Install only when the surface is sound, the location is safe to drill, sunlight is adequate, and the light will not obstruct access or create glare. | The selected location meets the sunlight, drainage, spacing, and access checks, with anchor clearance still to be confirmed. | Approve After Final Check |
Note: Anchor spacing, hole diameter, embedment depth, concrete thickness, and edge clearance must always follow the installation instructions for the selected solar bollard light and anchor system. Local building, electrical, accessibility, and utility-safety requirements may also apply.
Check for cracks, loose edges, standing water, and uneven areas. Tap the slab lightly for hollow sounds. Stability matters more than appearance.
Choose a clear area with strong sunlight from morning through late afternoon. Keep it away from doors, ramps, and narrow walking paths.
Mark possible positions with chalk. Observe them at different times. Walls, trees, balconies, and parked vehicles may block sunlight later.
In the northern hemisphere, south-facing placement often works well. Actual shadows matter more than direction alone. Aim toward the strongest daily sunlight.
Look for buried cables, pipes, and embedded reinforcement. Measure the walkway first. Use a suitable concrete bit and follow the fixture’s anchoring requirements.
Check the surface slope near drains. Place the light where water will not remain around its base. Small puddles can create recurring maintenance problems.
Cover the solar panel with a dark cloth during daylight. Check the sensor or operating mode. At dusk, test brightness, motion response, and automatic switching.
Inspect shadows before replacing components. Check the battery level, sensor timing, and beam direction. Test again after two clear days.
No. Practical lighting matters more than perfect symmetry. My first layout looked neat, but one lamp sat beside a tall planter.
Yes. Use cardboard to preview glare, shadows, and proportions. It takes minutes. I should have done this earlier.
Learning how to install solar bollard lights on concrete begins with carefully assessing the site. Choose a location with strong sunlight, enough space for walking or landscaping needs, and a stable, level concrete surface. Before starting, gather the required tools and materials, such as a measuring tape, pencil, drill, suitable masonry bits, anchors, screws, a level, and basic safety equipment including gloves and eye protection. Check the light components and instructions so you understand how the base, battery, solar panel, and light fixture fit together.
Mark the mounting points accurately, then drill into the concrete using the correct bit and depth for the anchors. Remove dust from the holes before securing the bollard base firmly with appropriate fasteners. Assemble the light, connect its components as directed, and make sure everything is stable and weather-resistant. Finally, switch on the light or activate its operating mode to test it. Adjust the solar panel toward the strongest available sunlight, keeping it free from shade and obstructions, to improve charging performance and nighttime illumination.

 Merak Lighting