Top 10 Reasons Why LED Grow Lights Turn Yellow?

Time:2026-10-31 Author:Henry
0%

Yellowing on an LED grow light can be easy to miss at first. A diffuser may turn amber, a lens may look cloudy, or the light across the canopy may seem weaker than before. If you are asking, “why are my led grow lights turning yellow,” the color alone does not identify one cause. Heat, aging materials, dust, moisture, and changes in plant lighting can all affect what you see.

This guide examines ten common reasons, from yellowed plastic covers and accumulated residue to driver problems and excessive operating temperatures. Some signs are visible on the fixture; others require checking the room, mounting distance, or manufacturer’s care instructions. A warm lens, for example, may point toward heat exposure, while a dusty surface can simply need gentle cleaning. The distinction matters.

Before replacing a fixture, unplug it and let it cool. Check for discoloration, cracked parts, unusual smells, flickering, or water exposure. Never open electrical components unless the manufacturer specifically permits it and you have the right expertise. Small clues help, but they do not prove a diagnosis. That matters. LED designs and materials vary, so the same yellow tint can have different explanations across models. The following overview offers practical checks and explains when contacting the manufacturer or a qualified technician is the safer choice. It also notes what routine care can and cannot fix, helping you protect both your lighting investment and the consistency of your grow space.
Top 10 Reasons Why LED Grow Lights Turn Yellow?

How Yellowing Appears in LED Grow Lights

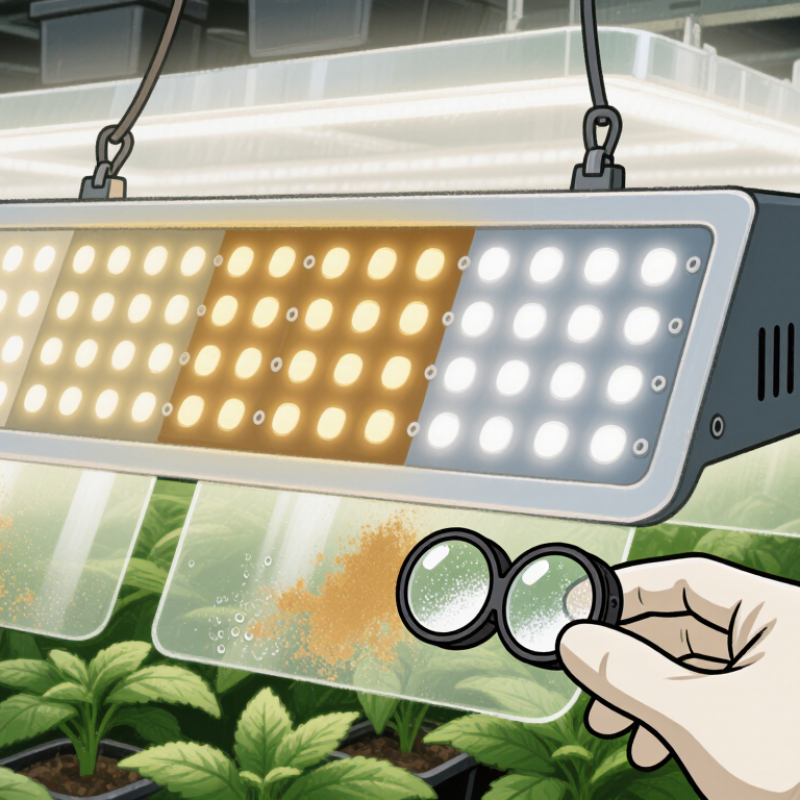
Yellowing in an LED grow light usually shows up on the surface before it changes the whole room’s color. A clear lens may develop a tea-like tint, while a white diffuser can look cream or amber. The change may be patchy, especially around individual diodes or near the fixture’s center. Sometimes the LED chips themselves look yellow because of their phosphor coating. A warmer-looking beam alone does not prove damage.

Look closely with the fixture switched off and cool. Dust and nutrient residue can mimic discoloration, but they usually sit on the surface and may wipe away with a soft, dry cloth. Persistent yellowing inside a sealed lens may point to aging plastic, heat exposure, or coating changes. Compare the fixture with a new white sheet under neutral room lighting; colored grow-light output can fool the eye. Small differences are easy to misread.

Check whether the tint is even, localized, or paired with dim sections. A yellow patch beside a hot spot deserves attention, particularly if the housing feels unusually warm or the lens looks brittle. Do not open a powered fixture to inspect it. Plant leaves can yellow for unrelated reasons, so their color alone cannot diagnose a light problem. That distinction is easy to overlook.

Top 10 Reasons LED Grow Lights Turn Yellow

Yellowing usually affects the lens, diffuser, or housing—not the LED chips themselves. The chart ranks common causes by qualitative inspection priority; it is not a measured frequency or failure-rate study.

Start by checking for heat discoloration, UV exposure, and residue. Compare the affected surface with an unexposed area, and consult the fixture manufacturer’s temperature and cleaning guidance.

Ten Common Causes of Yellowing in LED Grow Lights

Top 10 Reasons Why LED Grow Lights Turn Yellow?

Ten Common Causes of Yellowing in LED Grow Lights

Yellowing can affect a fixture’s lens, diffuser, or LED package, and each points to a different issue. Common causes include dust buildup, excess heat, sunlight or UV exposure, aging phosphor, oxidizing silicone, chemical vapors, moisture, condensation, excessive drive current, and blocked ventilation. Cleaning products can also discolor plastic covers. A yellow cover may reduce light transmission, but it does not automatically mean the LEDs themselves have failed. Check where the color change appears. A DOE LED luminaire reliability report identifies heat and material degradation as reliability concerns; ANSI/IES LM-80-21 specifies at least 6,000 hours of testing for LED package lumen and color maintenance. These measurements help track changes, but they do not diagnose every complete grow-light fixture.

Tips: Switch off and cool the fixture before inspection. Wipe the cover with a soft, dry cloth; avoid solvents unless the maker approves them. Check vents, fans, and nearby chemical sources, then compare light output across the fixture. A yellow lens may be replaceable; a browned LED board needs qualified service. Don’t guess. If yellowing returns after cleaning, record operating hours and temperature, then contact the supplier with photos.

How to Diagnose the Source of the Yellowing

To diagnose yellowing, first identify what has changed: the lens, the light output, or nearby plant leaves. Check the lens first. With the fixture unplugged and cool, inspect its clear cover for a yellow or brown patch, haze, dust, or residue. A uniform tint may indicate aging of the optical material; a localized mark near hot spots can point to excess heat. Clean only as the fixture’s care instructions allow, then compare the surface under neutral white light.

Next, compare the fixture’s spectrum and photosynthetic photon flux density (PPFD) with its original readings, if available. A handheld spectrometer can reveal a shift toward longer wavelengths even when the lens looks clear. Check for uneven color between LED zones, loose connections, blocked vents, and a hot driver. IES LM-80 test data track LED-package light output and color over time; the method uses at least 6,000 hours of testing, with many datasets extending to 10,000 hours. These package tests do not diagnose a complete grow light, but they offer a useful aging benchmark. A visual check can mislead. Record ambient temperature, operating hours, and readings before replacing parts; the cause may be a yellowed cover, not failing LEDs.

Ways to Prevent Yellowing and Extend Light Lifespan

To prevent LED grow lights from turning yellow, control heat before it builds up. Keep vents clear and leave the space around the fixture open. A dusty fan or blocked heat sink can trap warmth, speeding wear in lenses, coatings, and LED materials. Check the fixture temperature against its manual; touch alone is not a reliable gauge. Heat matters.

Keep humidity and water away from electrical parts. In damp grow spaces, use a fixture rated for the conditions, and inspect seals and cable entries regularly. Switch the light off and let it cool before cleaning. Wipe the lens with a soft, dry microfiber cloth. Avoid abrasive pads and household solvents, which may cloud plastic. Small scratches can spread light unevenly.

Use the specified driver and input voltage, and avoid dimming or overdriving beyond the manufacturer’s limits. A surge protector may help reduce damage from voltage spikes, though it cannot prevent every failure. Record color changes and compare photos under similar settings every few months. If yellowing appears suddenly, flickers, or comes with a burnt smell, stop using the fixture and seek qualified service. A clean fixture can still age; maintenance only slows avoidable wear.

When to Repair or Replace a Yellowing Grow Light

Top 10 Reasons Why LED Grow Lights Turn Yellow?

When to Repair or Replace a Yellowing Grow Light

A yellow tint does not always mean the LED chips are failing. Often, the diffuser or protective lens has aged, collected residue, or suffered heat damage. Unplug the fixture and let it cool before inspecting it. Look for cloudy patches, cracks, melted areas, or a yellow color that appears across the whole panel. Check whether plants receive less light than before, using the same height and timer settings. A phone light meter is not exact, but it can reveal a noticeable change. It is easy to blame the LEDs too quickly.

Tips: Wipe the cool lens with a soft, dry cloth. Avoid solvents unless the fixture manual approves them. Note any flickering, unusual heat, or burnt smell.

Repair may make sense when yellowing is limited to a replaceable cover, cable, or driver, and a qualified technician can source a compatible part. Stop using the light if wiring is exposed, the housing is warped, or the unit smells burnt. Replace it when discoloration is widespread, output has dropped substantially, or repair costs approach the price of a suitable new fixture. Don’t guess with electrical parts. If performance is uncertain, compare leaf growth and light readings over several days; those clues can be imperfect, but useful.

FAQS

What should I check first when a grow light looks yellow?

Unplug the fixture and let it cool. Inspect the clear cover for haze, dust, brown patches, or cracks.

Does a yellow cover mean the LED chips are failing?

Not always. Aged plastic, residue, or heat damage can tint the cover while the LEDs still work.

How can I tell whether the cover or light output has changed?

Compare the fixture’s current spectrum and PPFD with earlier readings, if available. Keep the height and timer settings unchanged.

Can a phone light meter help?

It can show a noticeable change, but it is not exact. Treat the reading as a clue, not proof.

What signs suggest excess heat or a connection problem?

Look for melted areas, uneven color between LED zones, blocked vents, loose connections, or an unusually hot driver. A visual check can still mislead.

How should I clean a yellowed lens?

Wipe the cool surface with a soft, dry cloth. Use solvents only if the fixture’s care instructions allow them.

When might repair be worthwhile?

Repair may suit a replaceable cover, cable, or driver when a qualified technician can find a compatible part. Don’t guess with electrical components.

When should I stop using or replace the fixture?

Stop using it if wiring is exposed, the housing is warped, or it smells burnt. Consider replacement if discoloration is widespread or output has dropped substantially.

What information helps diagnose gradual yellowing?

Record operating hours, ambient temperature, and light readings before changing parts. Compare plant growth over several days too; those clues are useful, though imperfect.

Conclusion

Yellowing in LED grow lights can appear as a warm tint across the lens, uneven yellow patches, or a gradual shift in the color of the emitted light. If you are asking, “why are my led grow lights turning yellow,” possible causes include heat buildup, ultraviolet exposure, dust, aging materials, oxidation, moisture, chemical vapors, poor ventilation, electrical stress, or damage from harsh cleaning. The discoloration may affect only the cover, or it may signal declining light output or internal component wear.

To diagnose the problem, inspect the lens and housing, compare the light’s color and brightness with its usual performance, and check ventilation, temperature, moisture, and electrical connections. Clean surfaces gently and keep the fixture dry and well ventilated to help prevent further yellowing and extend its lifespan. If discoloration is limited to a replaceable cover, repair may be practical; if the light flickers, overheats, or has a major loss of brightness, have it assessed and consider replacing it.

Henry

Henry

Henry is a dedicated marketing professional with a profound expertise in the company's offerings. With years of experience in the industry, he possesses an impressive understanding of the market dynamics and consumer behaviors that drive success. Henry is committed to sharing his insights through......